티스토리 뷰
설치법
npm i styled-components
이용법
import styled from "styled-components"
사용 방법
const Father = styled.div`
  display: flex;
`;

const 이름  = styled.{htmltag 이름}` //<=(백틱)

css 내용

`;

function App() {
  return (
    <div className="App">
      <Father>
      </Father>
    </div>
  );
}
Adapting(적응) ,중복되는 css 내용에 속성만 변경하는 방법
import styled from "styled-components";

const Father = styled.div`
  display: flex;
`;

const Box = styled.div`
  background-color: ${(props) => props.bgColor};
  width: 100px;
  height: 100px;
`;

function App() {
  return (
    <div className="App">
      <Father>
        <Box bgColor="gray" />
        <Box bgColor="tomato" />
      </Father>
    </div>
  );
}

export default App;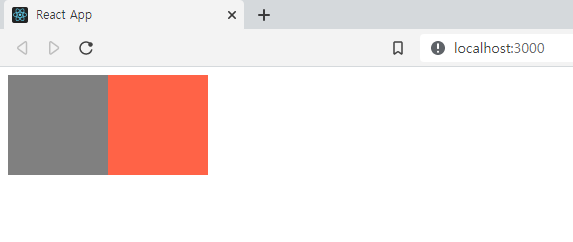
변수로 두고 싶은 css 코드에 ${props=>props.변수이름} 을 둔 후
<Box 변수이름="변수내용">
이렇게 사용하면 됩니다.
Extending (확장), 중복되는 css 내용에 속성을 추가하는 방법
import styled from "styled-components";

const Father = styled.div`
  display: flex;
`;

const Box = styled.div`
  background-color: ${(props) => props.bgColor};
  width: 100px;
  height: 100px;
`;

const Circle = styled(Box)`
  border-radius: 50px;
`;

function App() {
  return (
    <div className="App">
      <Father>
        <Box bgColor="gray" />
        <Circle bgColor="tomato" />
      </Father>
    </div>
  );
}

export default App;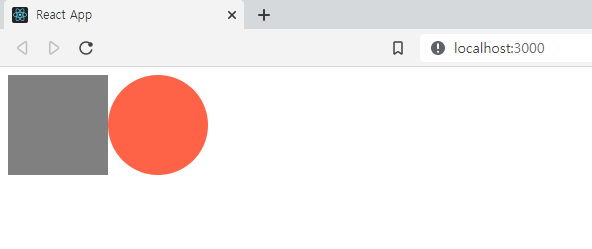
어떤 css 내용에 다른 속성만 추가해서 사용하고 싶을 때는
const 변수이름 = styled(중복해서 사용하고자하는 css이름)`
추가되는 css 코드
`;
이렇게 사용하면 됩니다.
as(같이) , 기존의 css 코드를 사용하되 htmlTag를 변경하고 싶을 때
import styled from "styled-components";

const Father = styled.div`
  display: flex;
`;

const Btn = styled.button`
  background-color: tomato;
  color: white;
  width: 100px;
  height: 50px;
  border-radius: 20px;
  font-size: 18px;
  display: flex;
  justify-content: center;
  align-items: center;
`;

function App() {
  return (
    <div className="App">
      <Father>
        <Btn>Click Me</Btn>
        <Btn as="a" href="/">
          Click Me
        </Btn>
      </Father>
    </div>
  );
}

export default App;
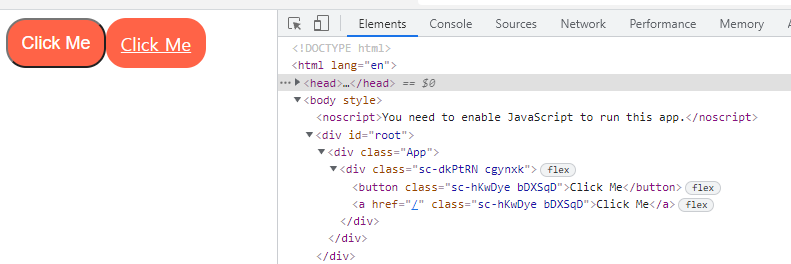
Btn 이라는 변수를 만들었지만 button 태그말고 a 태그로도 사용하고 싶을 때는
<Btn as="a" href="/"></Btn> 처럼
as 를 추가하면 다른태그로 변경할 수 있습니다.
atters ,(attribute 속성) , 변수에 어떠한 속성을 고정적으로 주고 싶을 때
import styled from "styled-components";

const Father = styled.div`
  display: flex;
  flex-direction: column;
`;

const Input = styled.input.attrs({ required: true, minLength: 10 })`
  background-color: tomato;
  color: white;
  width: 100px;
  height: 50px;
  border-radius: 20px;
  font-size: 18px;
  display: flex;
  justify-content: center;
  align-items: center;
`;

function App() {
  return (
    <div className="App">
      <Father>
        <Input />
        <Input />
        <Input />
        <Input />
        <Input />
        <Input />
      </Father>
    </div>
  );
}

export default App;
input을 많이 사용하는데 각각마다 required를 계속 붙이는 것 보다 attrs로 해당 변수에 고정적인 속성내용을 부여할 수 있다.
const 변수이름 = styled.div.attrs({ 속성 EX: required:true, minLength : 10})`
css 코드내용
`;
Animation , 애니메이션 주는 방법
import styled, { keyframes } from "styled-components";

const Father = styled.div`
  display: flex;
  flex-direction: column;
  justify-content: center;
  align-items: center;
  height: 100vh;
`;

const rotateAni = keyframes`
  0%{
    transform:rotate(0deg);
    border-radius:0px
  }50%{
    transform: rotate(360deg);
    border-radius:50%
  }100%{

    transform: rotate(0deg);
    border-radius:0px;
  }
`;

const Box = styled.div`
  background-color: tomato;
  width: 300px;
  height: 300px;
  animation: ${rotateAni} linear 1s infinite;
`;

function App() {
  return (
    <div className="App">
      <Father>
        <Box></Box>
      </Father>
    </div>
  );
}

export default App;

const 변수이름 = keyframes`
css 내용
`;
을 하면 애니메이션을 만들 수 있습니다.
사용할때는 사용하고자하는 대상 css 코드에서
animation : ${애니메이션 변수이름} css코드
로 사용할 수 있습니다.
pesudo selector , 특정 태그 선택하는 방법
import styled, { keyframes } from "styled-components";

const Father = styled.div`
  display: flex;
  flex-direction: column;
  justify-content: center;
  align-items: center;
  height: 100vh;
`;

const Box = styled.div`
  background-color: tomato;
  width: 300px;
  height: 300px;
  display: flex;
  justify-content: center;
  align-items: center;
  span {
    font-size: 50px;
    &:hover {
      font-size: 100px;
    }
    &:active {
      opacity: 0;
    }
  }
`;

function App() {
  return (
    <div className="App">
      <Father>
        <Box>
          <span>😍</span>
        </Box>
      </Father>
    </div>
  );
}

export default App;
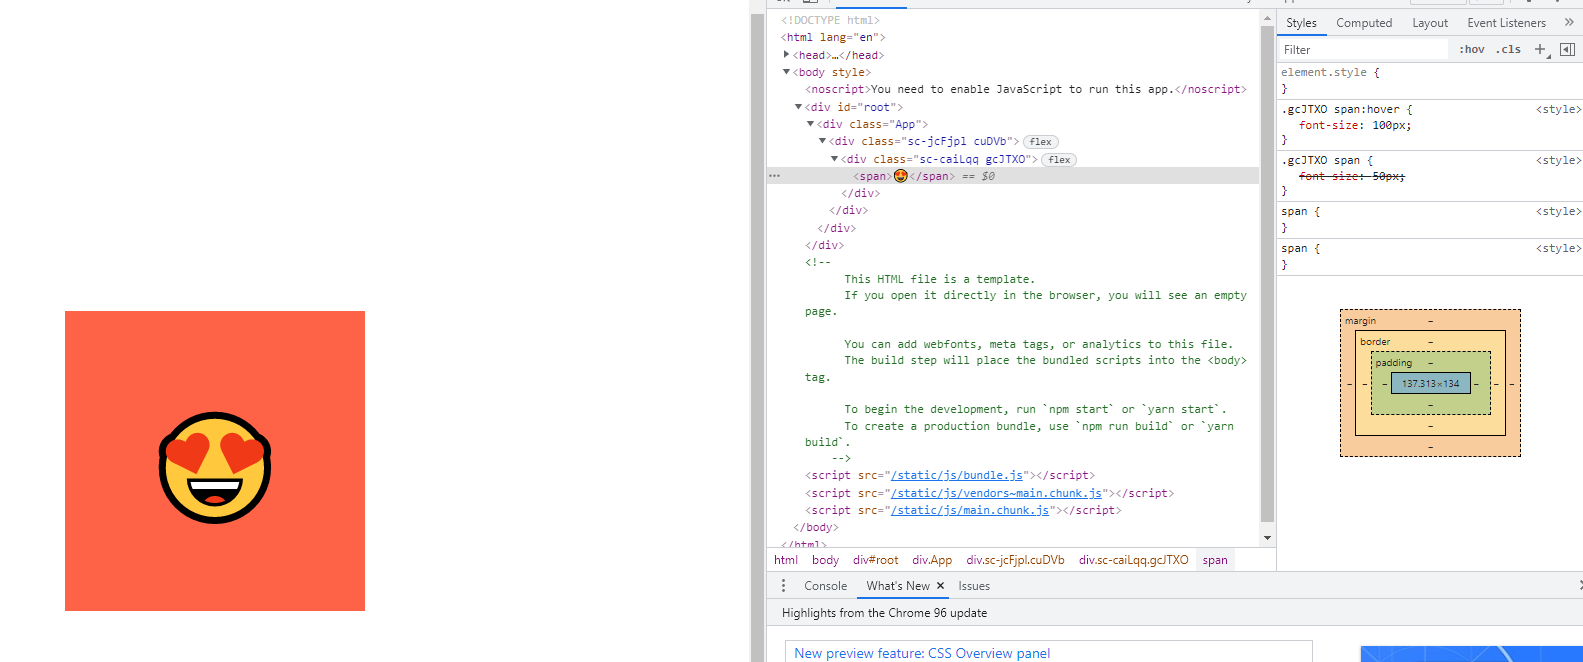
변수안에 있는 태그를 특정지어서 선택하고 싶을 때
예를들어
<Box>
<span>😍</span>
</Box>
이렇게 있는 span을 선택하고 싶을 때
const Box = styled.div`
css 코드
span{
css 코드
&:hover{
css코드
}
}
`
이렇게 사용 가능합니다.
기본적으로 sass 와 비슷합니다.
if문처럼 특정조건에서만 css 내용이 필요할 때
import styled, { keyframes } from "styled-components";

const Father = styled.div`
  display: flex;
  flex-direction: column;
  justify-content: center;
  align-items: center;
  height: 100vh;
`;

const Emoji = styled.span`
  font-size: 50px;
`;

const Box = styled.div`
  background-color: tomato;
  width: 300px;
  height: 300px;
  display: flex;
  justify-content: center;
  align-items: center;
  ${Emoji} {
    font-size: 50px;
    &:hover {
      font-size: 100px;
    }
    &:active {
      opacity: 0;
    }
  }
`;

function App() {
  return (
    <div className="App">
      <Father>
        <Box>
          <Emoji>😍</Emoji>
        </Box>
        <Emoji>😍</Emoji>
      </Father>
    </div>
  );
}

export default App;
Box 안에 ${Emoji}로 css 내용을 추가하였는데
밑에 Emoji 자체로는 hover가 적용 되지 않지만 Box 안에 있을 때 적용된다는 식으로 if문처럼 사용할 수 있습니다.
Theme Provider , 다크모드,라이트모드 테마 변경하기
이용법
App, index 에 Provider을 import 해줍니다.
import { ThemeProvider } from "styled-components";사용법
1.App을 ThemeProVider로 감싸줍니다.
ReactDOM.render(
  <React.StrictMode>
    <ThemeProvider theme={lightTheme}>
      <App />
    </ThemeProvider>
  </React.StrictMode>,
  document.getElementById("root")
);
2. dark , light css 코드를 index.js 에 적어줍니다. 각각의 프로퍼티의 이름은 같아야 합니다. textColor, backgroundColor
import React from "react";
import ReactDOM from "react-dom";
import { ThemeProvider } from "styled-components";
import App from "./App";

const darkTheme = {
  textColor: "whitesmoke",
  backgroundColor: "#111",
};

const lightTheme = {
  textColor: "#111",
  backgroundColor: "whitesmoke",
};

ReactDOM.render(
  <React.StrictMode>
    <ThemeProvider theme={lightTheme}>
      <App />
    </ThemeProvider>
  </React.StrictMode>,
  document.getElementById("root")
);
3.App.js 에서 변환시키고자하는 부분에 props.theme.textColor or backgroundColor 등을 입력해줍니다
import styled, { keyframes, ThemeProvider } from "styled-components";

const Father = styled.div`
  display: flex;
  flex-direction: column;
  justify-content: center;
  align-items: center;
  height: 100vh;
  background-color: ${(props) => props.theme.backgroundColor};
`;

const Title = styled.span`
  color: ${(props) => props.theme.textColor};
  font-size: 24px;
`;

function App() {
  return (
    <div className="App">
      <Father>
        <Title>Hello</Title>
      </Father>
    </div>
  );
}

export default App;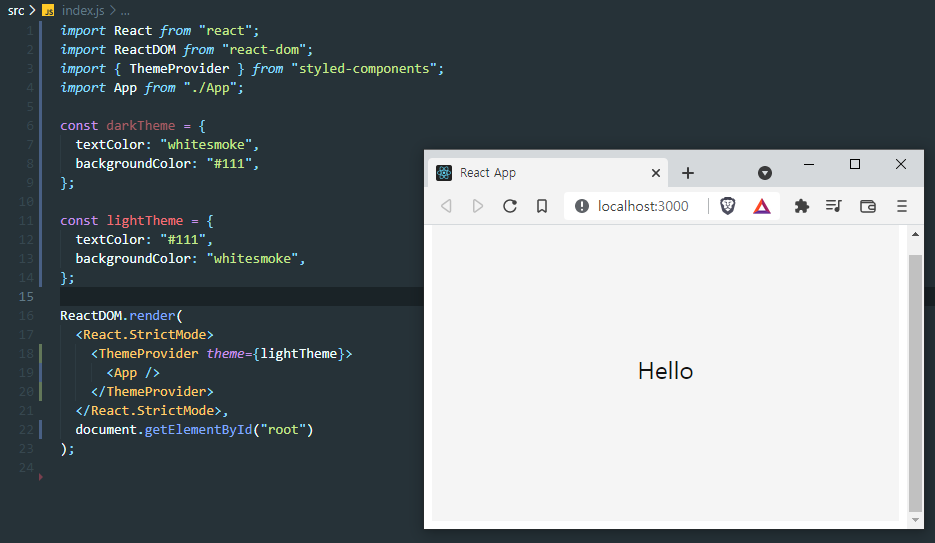

공부하며 느낀 점
기존에 사용하던 css , <App styles={{backgroundColor:"tomato"}}>, App.module.css , sass 등과는 비교할 수 없을정도로 많은 장점을 가지고 있는 것 같아 감동을 받았습니다.
'react' 카테고리의 다른 글
| use State Management 를 해주는 Recoil에 관한 글 (0) | 2021.12.02 |
|---|---|
| TypeScript + React (0) | 2021.11.25 |
| React useParams (0) | 2021.11.23 |
| React Cleanup (0) | 2021.11.21 |
| React useEffect (0) | 2021.11.21 |
- Total
- Today
- Yesterday
- 프론트앤드
- createPortal
- error
- 아차산
- 초보
- 북클럽
- electron
- 노개북
- NextRequest
- Storybook
- 우아한테크코스
- C언어
- 위코드
- TopLayer
- WSL2
- nextjs
- 프리온보딩
- 원티드
- jest
- CLASS
- NextApiRequest
- javascript
- 스토리 북
- env
- nodejs
- import/order
- React
- 노마드코더
- 윤성우 열혈C프로그래밍
| 일 | 월 | 화 | 수 | 목 | 금 | 토 |
|---|---|---|---|---|---|---|
| 1 | ||||||
| 2 | 3 | 4 | 5 | 6 | 7 | 8 |
| 9 | 10 | 11 | 12 | 13 | 14 | 15 |
| 16 | 17 | 18 | 19 | 20 | 21 | 22 |
| 23 | 24 | 25 | 26 | 27 | 28 | 29 |
| 30 |
